Japanese Katsu Bowls with Tonkatsu Sauce are a delightfully crispy and savory dish that brings comfort food to a new level. This flavorful meal features tender panko-coated chicken or pork served over fluffy rice, drizzled with tangy tonkatsu sauce. If you’re looking to impress friends or family with an easy yet impressive dish, katsu bowls are perfect for any occasion. They not only deliver on taste but also texture, offering golden-brown crispy bites that are sure to please. The combination of juicy meat with rich sauce and creamy mayonnaise makes every bite a taste sensation. So, why wait? Let’s dive into the delicious process of making Japanese Katsu Bowls with Tonkatsu Sauce.
Why Make This Recipe
Making Japanese Katsu Bowls at home is an excellent choice for a satisfying meal. The process is simple and allows you to customize the flavors to your liking. You can enjoy the crunch of panko breadcrumbs combined with the savory richness of tonkatsu sauce—all served over a bed of fluffy rice. Cooking katsu at home also means you can control the ingredients, ensuring fresh and high-quality components. This dish is perfect for busy weeknights or for entertaining guests, as it balances comfort and elegance effortlessly.
How to Make Japanese Katsu Bowls with Tonkatsu Sauce
Ingredients:
- 2 boneless, skinless chicken breasts (or pork chops)
- 1 cup all-purpose flour
- 2 large eggs, beaten
- 2 cups panko breadcrumbs
- 1 tsp salt
- ½ tsp black pepper
- ½ tsp garlic powder
- ½ cup vegetable oil (for frying)
- 2 cups cooked white rice
- ¼ cup tonkatsu sauce (store-bought or homemade)
- 2 tbsp Japanese mayo (optional)
- Chopped parsley or green onions for garnish
Special Equipment:
- Shallow frying pan
- Meat mallet (to pound chicken evenly)
- Wire rack (for draining excess oil)
Directions:
- Prepare the Chicken: Pound the chicken breasts to an even thickness (about ½ inch). Season both sides with salt, pepper, and garlic powder.
- Coat the Chicken: Set up a dredging station with three bowls: one with flour, one with beaten eggs, and one with panko breadcrumbs. Coat each chicken piece in flour, dip into the egg, and then press into panko to fully coat.
- Fry to Perfection: Heat oil in a pan over medium heat. Once hot, fry each piece for 3-4 minutes per side until golden brown and cooked through. Drain on a wire rack.
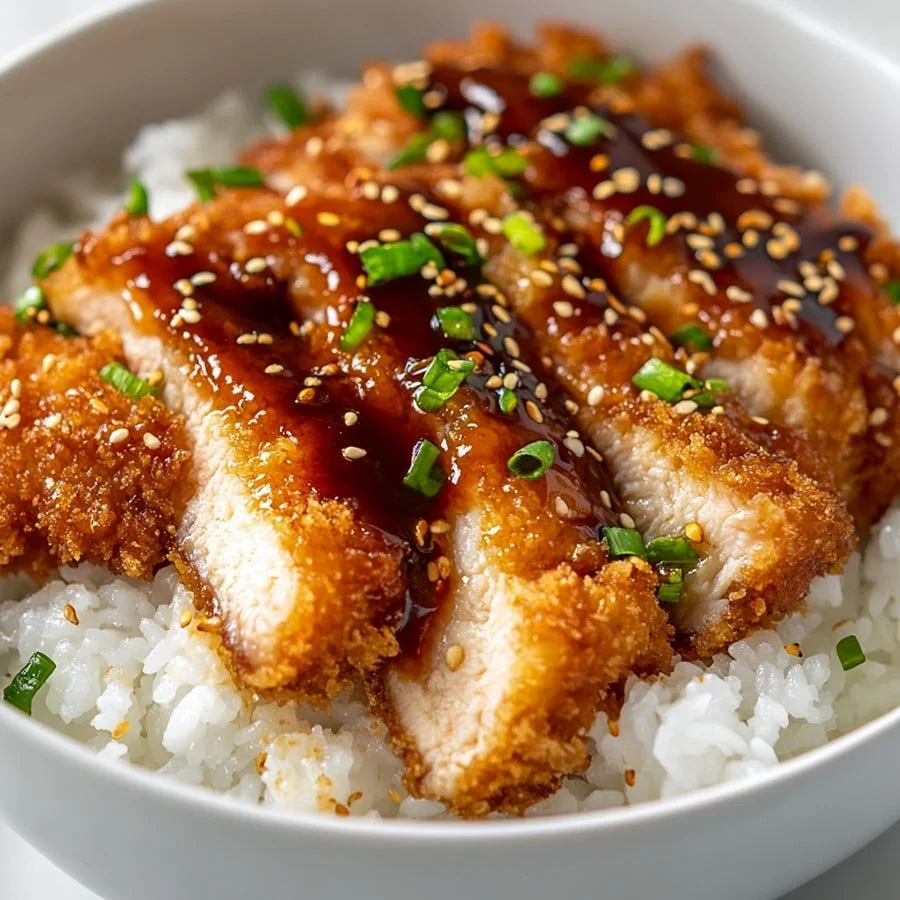
- Assemble the Bowls: Divide the rice between bowls, slice the katsu, and place it on top. Drizzle with tonkatsu sauce and Japanese mayo. Garnish with chopped parsley or green onions.
- Serve & Enjoy: Dig in while it’s hot and crispy!
How to Serve Japanese Katsu Bowls with Tonkatsu Sauce
Serving Japanese Katsu Bowls is about showcasing the beautiful layers of flavor and texture. Start by placing a generous amount of white rice in the bottom of a bowl. Next, slice the crispy katsu into strips and artfully arrange them on the rice. Drizzle the tonkatsu sauce generously over the chicken, allowing it to coat the meat and rice. If desired, add a dollop of Japanese mayo for extra creaminess. Finally, garnish the dish with a sprinkle of chopped parsley or green onions for a fresh touch. The vibrant colors of this meal make it not only delicious but visually appealing too!
How to Store Japanese Katsu Bowls with Tonkatsu Sauce
If you have leftovers, storing your Japanese Katsu Bowls is easy. Allow the katsu and rice to cool to room temperature. Place the cooled chicken in an airtight container, separating it from the rice to maintain texture. Store in the refrigerator for up to 3 days. When you’re ready to enjoy, reheat the katsu in a frying pan over low heat until crispy again. You can reheat the rice separately in the microwave. Avoid freezing the already fried katsu, as this could affect its crispy texture.
Tips to Make Japanese Katsu Bowls with Tonkatsu Sauce
- Chicken or Pork: While chicken is the traditional choice, using pork chops can give you a different flavor. Choose what you prefer!
- Pounding the Meat: Make sure to pound the chicken or pork evenly. This ensures even cooking and tenderness.
- Perfect Frying: If you’re frying, ensure the oil is hot enough. If it’s too cool, the katsu will absorb more oil and become greasy.
- Wrap the Leftovers: To keep any leftovers fresh, tightly cover them with plastic wrap if you don’t have an airtight container. This prevents the rice from drying out.
- Garnish Wisely: Experiment with different toppings! Shredded cabbage or pickled vegetables can enhance the flavors and texture.
Variation
Feel free to add extra toppings or ingredients to customize your katsu bowl. Some ideas include adding a fried egg on top, sautéed vegetables, or even spicy mayo for additional heat. You can also switch the rice for quinoa or cauliflower rice for a healthier alternative.
Conclusion
In summary, Japanese Katsu Bowls with Tonkatsu Sauce make for a satisfying and delicious meal that can be enjoyed by everyone. The crispy katsu, accompanied by fluffy rice and rich sauce, creates a wholesome dish that’s hard to resist. Try making this recipe at home for an easy weeknight dinner or impress your guests at your next gathering. Don’t forget to share your experience and how you modified the recipe to make it your own. Happy cooking!
FAQ SECTIONS
1. Can I use other types of meat for katsu?
Yes, you can use pork, beef, or even tofu if you prefer a vegetarian option.
2. What is tonkatsu sauce made of?
Tonkatsu sauce is typically made from a blend of fruits, vegetables, and seasonings, including Worcestershire sauce and ketchup, for a sweet and tangy flavor.
3. Can I make katsu bowls in advance?
While it’s best served fresh, you can prepare the components in advance and assemble the bowls when you’re ready to eat.
4. What sides go well with katsu bowls?
Try serving katsu bowls with pickled vegetables, miso soup, or a simple cucumber salad to complement the meal.
5. Can I bake the katsu instead of frying?
Yes, you can bake the katsu at a high temperature for a healthier option. Just make sure to use a baking sheet and a light spray of oil for crispiness.
Japanese Katsu Bowls with Tonkatsu Sauce
Ingredients
Method
- Pound the chicken breasts to an even thickness (about ½ inch). Season both sides with salt, pepper, and garlic powder.
- Set up a dredging station with three bowls: one with flour, one with beaten eggs, and one with panko breadcrumbs. Coat each chicken piece in flour, dip into the egg, and then press into panko to fully coat.
- Heat oil in a pan over medium heat. Once hot, fry each piece for 3-4 minutes per side until golden brown and cooked through.
- Drain on a wire rack.
- Divide the rice between bowls, slice the katsu, and place it on top.
- Drizzle with tonkatsu sauce and Japanese mayo.
- Garnish with chopped parsley or green onions.
- Dig in while it’s hot and crispy!