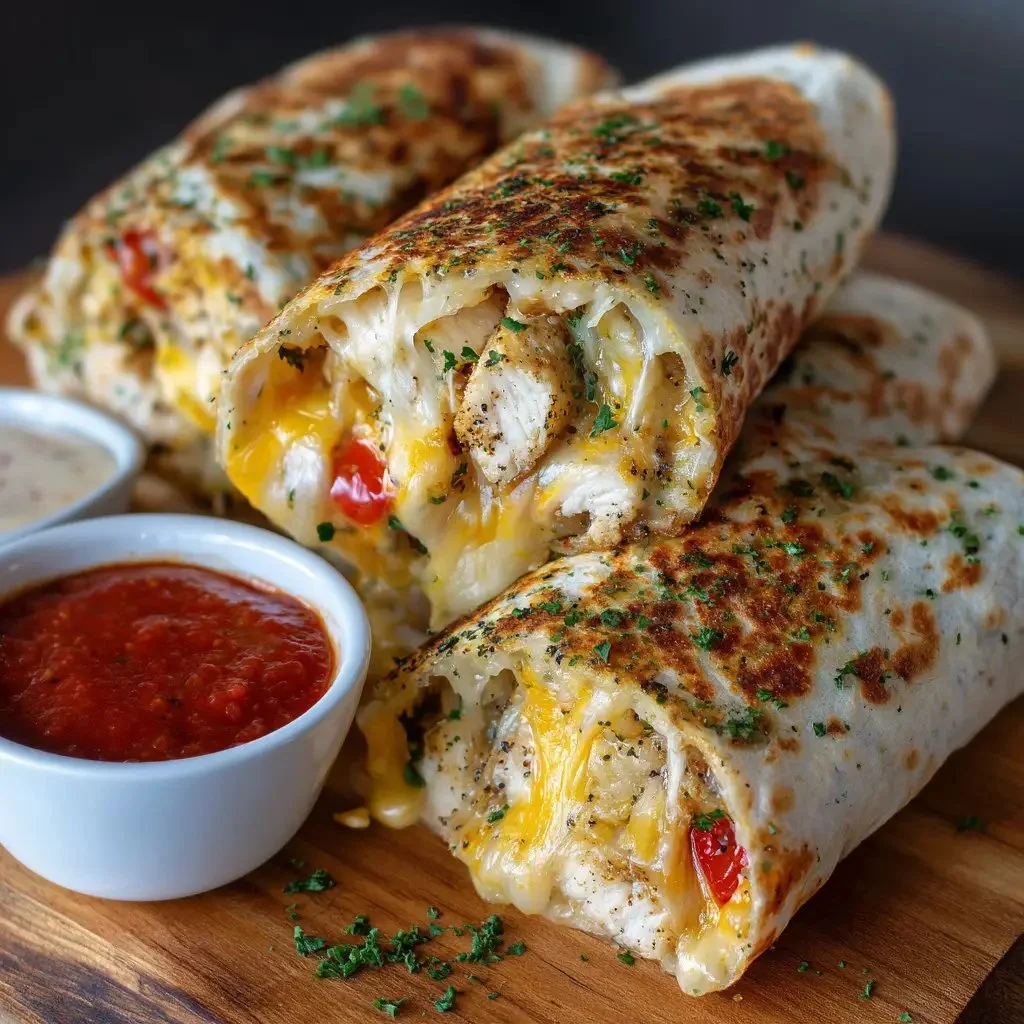
Cheesy Garlic Chicken Wraps are a delicious and easy meal that everyone will love. Packed with tender chicken, gooey cheese, and flavorful garlic, these wraps are perfect for lunch, dinner, or even a snack. They are quick to make and can be customized to suit your taste.
why make this recipe
This recipe is a great choice for several reasons. First, Cheesy Garlic Chicken Wraps are super easy to prepare. With only a few ingredients and some simple steps, you can whip up a tasty meal in less than 30 minutes. This makes them perfect for those busy weeknights when you want something delicious without spending hours in the kitchen.
Second, the flavor combination in these wraps is unbeatable. The garlic and cheese meld beautifully with the tender chicken, creating a dish that is both comforting and satisfying. You can easily enjoy these wraps with family or friends and see their smiles as they take that first bite.
Another reason to make this recipe is its versatility. You can add in your favorite veggies like spinach, peppers, or tomatoes to brighten things up and add even more taste and texture. You can also change the type of cheese or use different seasonings based on your preferences. This means that you can have a new twist on the recipe each time you make it.
Comforting, easy, and customizable, Cheesy Garlic Chicken Wraps are a must-try recipe for anyone looking for a satisfying meal.
how to make Cheesy Garlic Chicken Wraps
Making Cheesy Garlic Chicken Wraps is straightforward. Start by gathering your ingredients. You will need cooked chicken, shredded cheese (like mozzarella or cheddar), garlic, tortillas, and any additional ingredients you like, such as vegetables or sauces.
First, chop the cooked chicken into small pieces. If you are using leftover chicken, this is a great way to use it up. Next, mince the garlic. You can also use garlic powder if you prefer. In a skillet over medium heat, add a little olive oil and the minced garlic. Sauté it for about 1 minute until it is fragrant, but be careful not to burn it.
Then, add the chopped chicken to the skillet. Stir everything together for a few minutes until the chicken is heated through. Now is the time to add your shredded cheese. Stir until the cheese melts and coats the chicken, creating a cheesy mixture.
After that, take a tortilla and place a portion of the cheesy chicken mixture in the center. You can add any fresh veggies at this stage. Fold the sides of the tortilla over and roll it up tightly to create a wrap. You can use a skillet to toast the wrap slightly for a nice crunch. Repeat this process with the remaining tortillas and filling. Your Cheesy Garlic Chicken Wraps are now ready to enjoy!
how to serve Cheesy Garlic Chicken Wraps
Serving Cheesy Garlic Chicken Wraps is simple and fun! You can cut the wraps in half or into smaller pieces for easier eating. This makes them great for lunch boxes or parties. Arrange the wraps on a large platter for sharing or serve them individually on plates.
Consider adding side dishes to make the meal more filling. Fresh salads or crispy potato wedges work well alongside the wraps. You can also offer extra dipping sauces like ranch or barbecue on the side for fun and added flavor.
For an extra touch, garnish the wraps with chopped fresh herbs like parsley or cilantro. This adds color and freshness to the dish. Remember, serving is all about making the meal enjoyable and easy for everyone.
how to store Cheesy Garlic Chicken Wraps
If you have leftover Cheesy Garlic Chicken Wraps, storing them is easy. First, let the wraps cool down to room temperature. Once they are cool, wrap each one tightly in plastic wrap or aluminum foil. This will help keep them from drying out and will maintain their flavor.
You can also place the wrapped wraps in an airtight container for extra protection. Store them in the refrigerator for up to three days. If you want to keep them longer, you can freeze them. To freeze, wrap them in freezer-safe packaging and store them in the freezer for up to three months.
When you are ready to eat the wraps again, you can reheat them in a microwave or on a skillet. When microwaving, make sure to check them regularly so they do not get too hot. On a skillet, heat them on low until warmed through, which will also help maintain their crispy texture.
tips to make Cheesy Garlic Chicken Wraps
Here are some tips to make your Cheesy Garlic Chicken Wraps even better. First, use rotisserie chicken for a quick and easy option. This will save you time on cooking the chicken and will add flavor to your wraps.
Second, experiment with different types of cheese. While mozzarella is commonly used, cheddar, pepper jack, or even feta can make your wraps more exciting.
Additionally, don’t skip the garlic. Fresh garlic gives a great flavor that elevates the dish. If you love more spice, consider adding red pepper flakes to the chicken mixture.
Lastly, if you want a crispy wrap, toast them in a skillet with a little butter after you roll them up. This gives a nice crunch on the outside. These simple tips can take your Cheesy Garlic Chicken Wraps from good to great!
variation
There are many ways to alter Cheesy Garlic Chicken Wraps to fit your taste. For a healthier option, use whole wheat tortillas. You can also add more veggies such as bell peppers, spinach, or mushrooms to boost nutrition.
For a spicy kick, include jalapeños or use spicy cheese. If you’re a fan of sauces, drizzle ranch, buffalo sauce, or even a homemade garlic sauce inside the wrap. These small changes can create new flavors and experiences every time you enjoy this recipe.
FAQs
1. Can I use uncooked chicken for this recipe?
Yes, you can use uncooked chicken, but it must be cooked thoroughly before assembling the wraps. Sauté the chicken along with the garlic until it reaches a safe temperature.
2. How do I make the wraps gluten-free?
To make gluten-free wraps, simply use gluten-free tortillas made from rice or corn. The rest of the recipe stays the same.
3. Can I reheat the wraps?
Yes! You can reheat the wraps in the microwave or on a skillet. If they are frozen, let them thaw in the refrigerator overnight before reheating for best results.
Cheesy Garlic Chicken Wraps
Ingredients
Method
- Chop the cooked chicken into small pieces.
- Mince the garlic and set aside.
- In a skillet over medium heat, add a bit of olive oil and the minced garlic. Sauté for about 1 minute until fragrant.
- Add the chopped chicken to the skillet and stir for a few minutes until heated through.
- Stir in the shredded cheese and mix until melted and combined with the chicken.
- Take a tortilla and place a portion of the cheesy chicken mixture in the center. You can add fresh vegetables at this stage.
- Fold the sides of the tortilla over the filling and roll tightly to create a wrap.
- Optionally, toast the wrap in a skillet with a little butter for added crunch.