Craving something sweet, creamy, and banana-filled? This No Bake Banana Cheesecake is your new best friend. Whether you’re a seasoned dessert maker or a kitchen newbie, this no-fuss recipe will win you over with its simplicity and delicious results. Best of all—no oven required! That means it’s perfect for hot summer days, quick party prep, or just when you want to impress your friends and family without turning on the heat.
Why You Will Love This Recipe?
There are so many reasons this dessert has become a fan favorite, and once you try it, you’ll understand why. Here’s what makes this cheesecake irresistible:
- No baking required – Skip the oven and avoid heating your kitchen.
- Made with simple pantry staples – You probably already have most ingredients on hand.
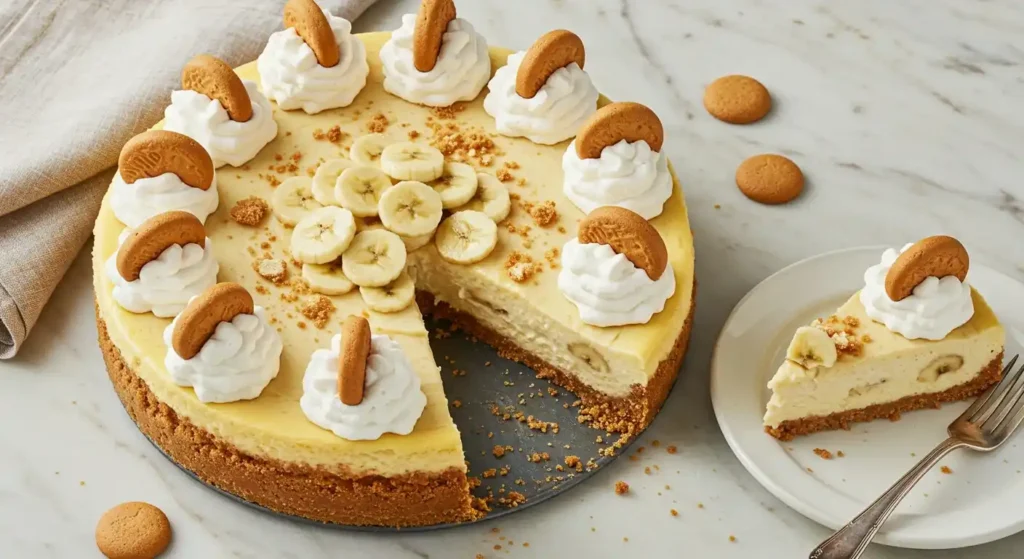
- Creamy, rich texture – With a luscious filling and light whipped topping, each bite melts in your mouth.
- A perfect banana twist – Natural banana flavor adds a tropical and nostalgic touch.
- Make-ahead friendly – Prepare it the night before and have a ready-to-serve dessert.
- Ideal for any occasion – From backyard barbecues to holiday dinners, this cheesecake fits in anywhere.
Ingredients You’ll Need
Creating a dreamy banana cheesecake doesn’t take much—just some classic ingredients and a little love. Here’s everything you’ll need, broken down by layer:
For the Crust:
- 2 ½ cups graham cracker crumbs – The foundation of your cheesecake. You can crush graham crackers in a food processor or use store-bought crumbs.
- 6 tablespoons unsalted butter, melted – Helps bind the crumbs and adds a rich flavor.
- 4 tablespoons sugar – Adds a touch of sweetness to balance the tangy filling.
- 2 bananas, sliced – A layer of fresh banana slices gives the crust an extra burst of banana flavor.
For the Cheesecake Filling:
- 16 oz cream cheese, softened – The base of any great cheesecake. Use full-fat cream cheese for the creamiest texture.
- 2 cups heavy cream – Whipped to soft peaks, this gives your cheesecake a light, airy finish.
- 2 cups powdered sugar – Dissolves easily into the filling for a smooth, sweet taste.
- 1 teaspoon vanilla extract – Adds warmth and depth to the flavor.
- 2 bananas, mashed – Ripe bananas are key for flavor and texture. They blend seamlessly into the creamy base.
For the Topping:
- 1 cup whipped cream – A soft and fluffy topping to finish off your masterpiece.
- Sliced bananas (optional) – Beautiful for garnish, though best added right before serving.
Step-by-Step Instructions
Step 1: Prepare the Crust
Start with a medium-sized mixing bowl. Combine the graham cracker crumbs, granulated sugar, and melted butter. Mix until the crumbs are evenly coated and resemble wet sand. Press the mixture firmly into the bottom of a 9-inch springform pan using a flat-bottomed glass or spoon.
Now for the banana twist—arrange a layer of banana slices on top of the crust. This not only infuses more flavor but also creates a subtle fruity layer that adds interest to each slice.
Place the crust in the freezer while you prepare the filling. This helps it firm up and hold its shape when the filling is added.
Step 2: Make the Cheesecake Filling
In a large bowl, beat the softened cream cheese and powdered sugar together until smooth and fluffy. Use a hand mixer or stand mixer for best results.
In a separate bowl, whip the heavy cream until soft peaks form. This means the cream should hold its shape but still be smooth and pillowy—not stiff.
Gently fold the whipped cream into the cream cheese mixture in batches. Folding rather than stirring helps retain the airy texture.
Add the mashed bananas and vanilla extract, folding everything together until well combined. Be gentle to avoid deflating the whipped cream.
Step 3: Assemble the Cheesecake
Remove the crust from the freezer and pour the cheesecake filling over the banana-layered crust. Spread it evenly using a spatula or the back of a spoon, smoothing out the top.
Give the pan a gentle tap on the counter to release any air bubbles and help the filling settle evenly.
Step 4: Chill the Cheesecake
Cover the cheesecake with plastic wrap or foil and refrigerate for at least 6 hours. For best results, let it chill overnight. The longer it rests, the firmer and more set the filling will become.
Step 5: Top and Serve
When you’re ready to serve, spread whipped cream on top of the cheesecake. Garnish with fresh banana slices just before serving. This not only looks beautiful but also enhances the banana flavor. Optional: Drizzle with a little caramel or chocolate sauce for a decadent finish.
Tips for Success
To make sure your No Bake Banana Cheesecake turns out perfectly every time, keep these pro tips in mind:
- Use ripe bananas – The riper, the better! They should be speckled brown and soft for the best flavor and sweetness.
- Soften your cream cheese – Let it sit at room temperature for 30 minutes to avoid lumps.
- Fold gently – Overmixing the filling can deflate the whipped cream, leading to a denser texture.
- Chill overnight if possible – This ensures the cheesecake sets fully and slices cleanly.
- Add bananas last – Bananas brown quickly, so always garnish just before serving.
Variations and Add-Ons
Want to give this classic dessert a little twist? Here are some easy ways to switch it up:
- Banana Pudding Cheesecake – Layer vanilla wafers and banana slices between the crust and filling for a banana pudding vibe.
- Chocolate Banana Cheesecake – Add a layer of chocolate ganache or swirl melted chocolate into the filling.
- Peanut Butter Banana Cheesecake – Stir in a few tablespoons of peanut butter to the filling for a classic flavor combo.
- Nut Crust – Swap out graham crackers for crushed pecans or walnuts for a nutty variation.
- Mini Cheesecakes – Use cupcake liners in a muffin tin for individual servings—great for parties!
Storage and Freezing Tips
One of the best parts of this dessert is how well it stores.
Store:
Keep your cheesecake covered with plastic wrap or in an airtight container in the refrigerator. It will stay fresh for up to 4 days. For best texture and flavor, consume within the first 2-3 days.
Freeze:
Want to save some for later? This cheesecake freezes beautifully—without the banana topping. Simply wrap tightly in plastic wrap and aluminum foil, or place slices in an airtight freezer-safe container. Freeze for up to 1 month. Thaw overnight in the fridge before serving.
Reheating:
No need! This is a chilled dessert and should always be served cold.
Final Thoughts
This No Bake Banana Cheesecake is the ultimate make-ahead dessert that combines simplicity, flavor, and texture. With layers of buttery crust, creamy banana-infused filling, and whipped topping, it’s a treat that feels both indulgent and refreshing.
Whether you’re making it for a birthday, holiday, summer barbecue, or just to treat yourself, this recipe becomes a repeat favorite. Plus, it’s customizable, adaptable, and just plain fun to make.
So go ahead—grab those ripe bananas and a mixing bowl. Dessert is just a chill away!
Would you like a printable version, a social media caption, or optimized metadata (like title tag and meta description) for SEO as well?
FAQ SECTION
Can I use store-bought whipped topping instead of whipping cream?
Yes, you can substitute 2 cups of thawed whipped topping (like Cool Whip) for the homemade whipped cream in the filling. Just be sure to fold it in gently.
Can I make this dessert gluten-free?
Absolutely! Use gluten-free graham crackers for the crust, and double-check all other ingredients for hidden sources of gluten.
How do I prevent the banana slices on top from turning brown?
Bananas naturally brown after exposure to air. To slow this process:
- Add them right before serving.
- Lightly brush slices with lemon juice (just a bit!) to reduce oxidation.
Can I make this cheesecake without a springform pan?
Yes, you can use a deep pie dish or an 8×8-inch square baking dish. Just be aware that serving slices may be a bit trickier without the removable sides of a springform.